游戏界面元素:准星与实时状态显示
 In games and simulators, the HUD (Heads-Up Display) is used to showcase important information or graphical elements. Our project also requires a HUD, where we will display current game statistics and provide a crosshair to aid the player in shooting. To achieve this, we can obtain the current GUI (Graphical User Interface) and add the required widgets as children. For the crosshair in the center of the screen, we will use WidgetSprite, which enables us to display any image in the UI.在游戏和模拟器中,抬头显示器(HUD)用于展示关键信息或图形元素。本项目需要实现一个HUD界面,用于显示当前游戏状态数据并提供射击辅助准星。为此,我们可以获取当前图形用户界面(GUI)并添加所需控件元素。屏幕中央的准星将使用WidgetSprite控件实现,该控件支持在UI中显示任意图像。
-
Create a HUD component and copy the following code into it:创建HUD组件并复制以下代码:HUD.h
HUD.h
源代码 (C++)#pragma once #include <UnigineComponentSystem.h> #include <UnigineGui.h> class HUD : public Unigine::ComponentBase { public: COMPONENT_DEFINE(HUD, Unigine::ComponentBase); // 准星参数配置 PROP_PARAM(File, crosshairImage, ""); PROP_PARAM(Int, crosshairSize, 16); // // 声明在程序执行序列各阶段调用的方法 COMPONENT_INIT(init); COMPONENT_UPDATE(update); // 指向屏幕GUI的链接 Unigine::GuiPtr screenGui = nullptr; protected: Unigine::WidgetSpritePtr sprite = nullptr; Unigine::Math::ivec2 prev_size; // 世界主循环重写方法 void init(); void update(); };#
HUD.cppHUD.cpp
源代码 (C++)#include "HUD.h" #include <UnigineGame.h> REGISTER_COMPONENT(HUD); using namespace Unigine; using namespace Math; void HUD::init() { // 获取当前屏幕GUI实例 screenGui = Gui::getCurrent(); // 创建准星控件 if (crosshairImage != "") sprite = WidgetSprite::create(screenGui, Unigine::FileSystem::guidToPath(FileSystem::getGUID(crosshairImage.getRaw()))); // 设置控件尺寸 sprite->setWidth(crosshairSize); sprite->setHeight(crosshairSize); // 将控件添加到GUI并保持居中显示(覆盖其他元素) screenGui->addChild(sprite, Gui::ALIGN_CENTER | Gui::ALIGN_OVERLAP); // 绑定控件生命周期到游戏世界 sprite->setLifetime(Widget::LIFETIME_WORLD); } void HUD::update() { ivec2 new_size = screenGui->getSize(); if (prev_size != new_size) { screenGui->removeChild(sprite); screenGui->addChild(sprite, Gui::ALIGN_CENTER | Gui::ALIGN_OVERLAP); } prev_size = new_size; }#
Save all the files that we modified and then build and run the application by hitting Ctrl + F5 to make the Component System update properties used to assign the components to nodes. Close the application after running it and switch to UnigineEditor.保存所有修改过的文件,然后按Ctrl + F5编译并运行应用程序,使组件系统更新用于将组件分配给节点的属性。运行后关闭应用程序并切换回UnigineEditor。 -
Create a NodeDummy, place it somewhere in the scene, name it HUD and add the HUD property to it.创建NodeDummy节点,放置在场景任意位置,命名为HUD并添加HUD属性(property)。
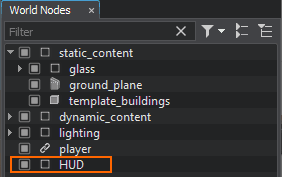
-
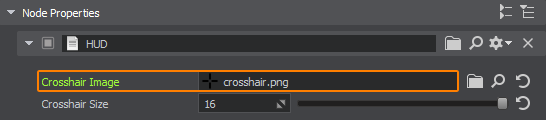
Add the data/fps/hud/crosshair.png file to the Crosshair Image field.将data/fps/hud/crosshair.png文件指定到Crosshair Image字段。
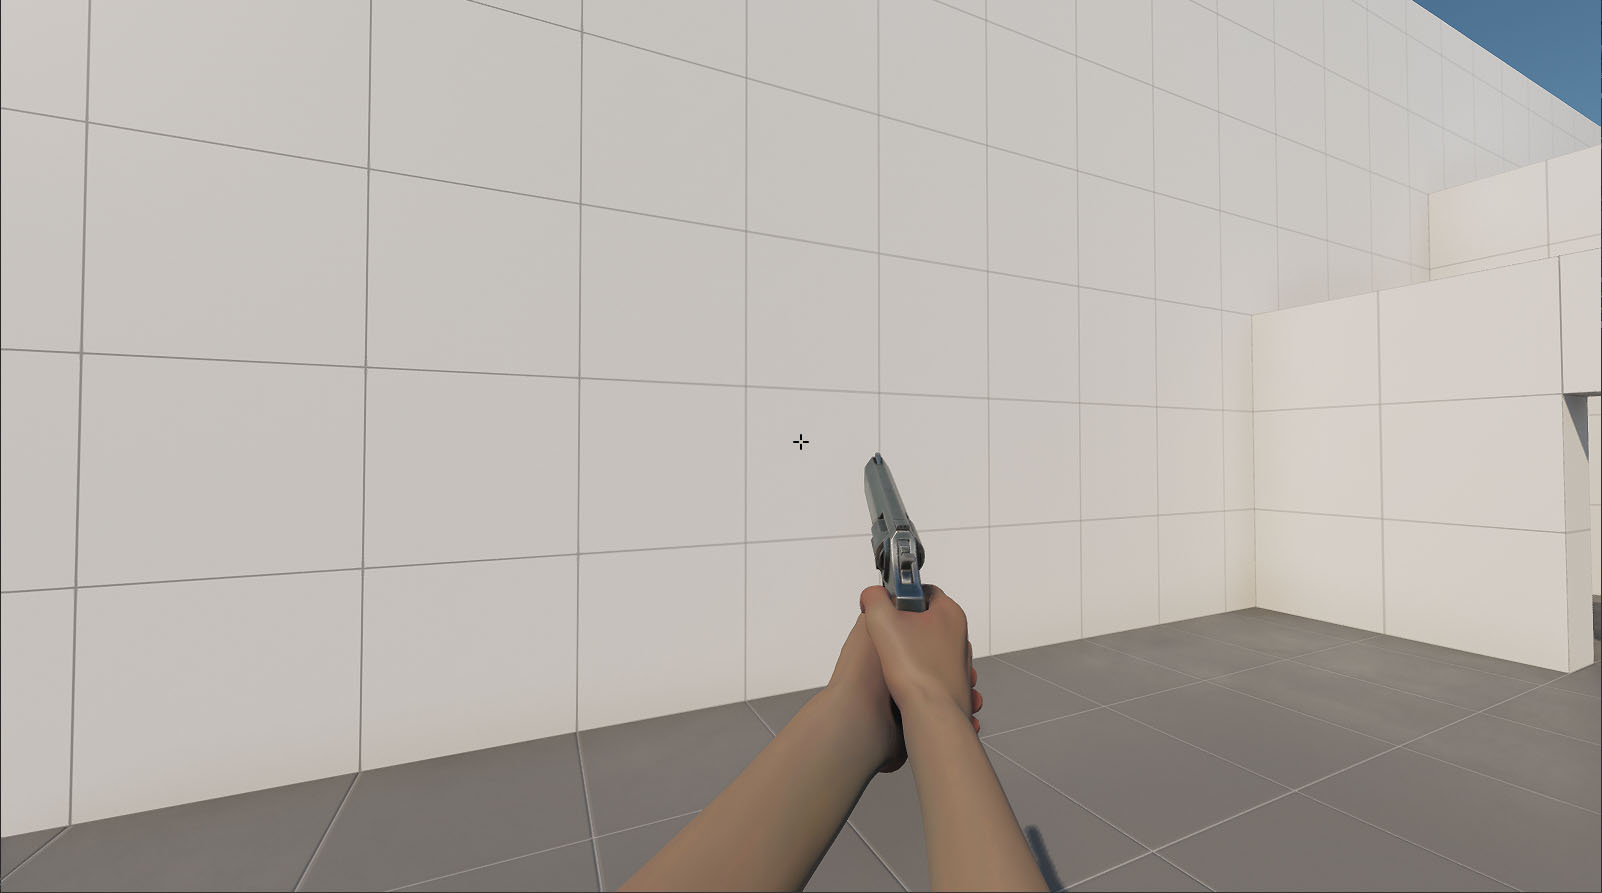
After compiling and running the application, you should get the following result:编译运行程序后,你将看到如下效果:
本页面上的信息适用于 UNIGINE 2.20 SDK.
